-
E-mail
znzbjc@163.com
-
Phone
18754369535
-
Address
108 Mastercard Road, Xingfu Town, Boxing County, Binzhou City, Shandong Province
Product Categories
Shandong Shangding Intelligent Equipment Co., Ltd
Tilting gas wok
NegotiableUpdate on 01/08
- Model
- Nature of the Manufacturer
- Producers
- Product Category
- Place of Origin
Overview
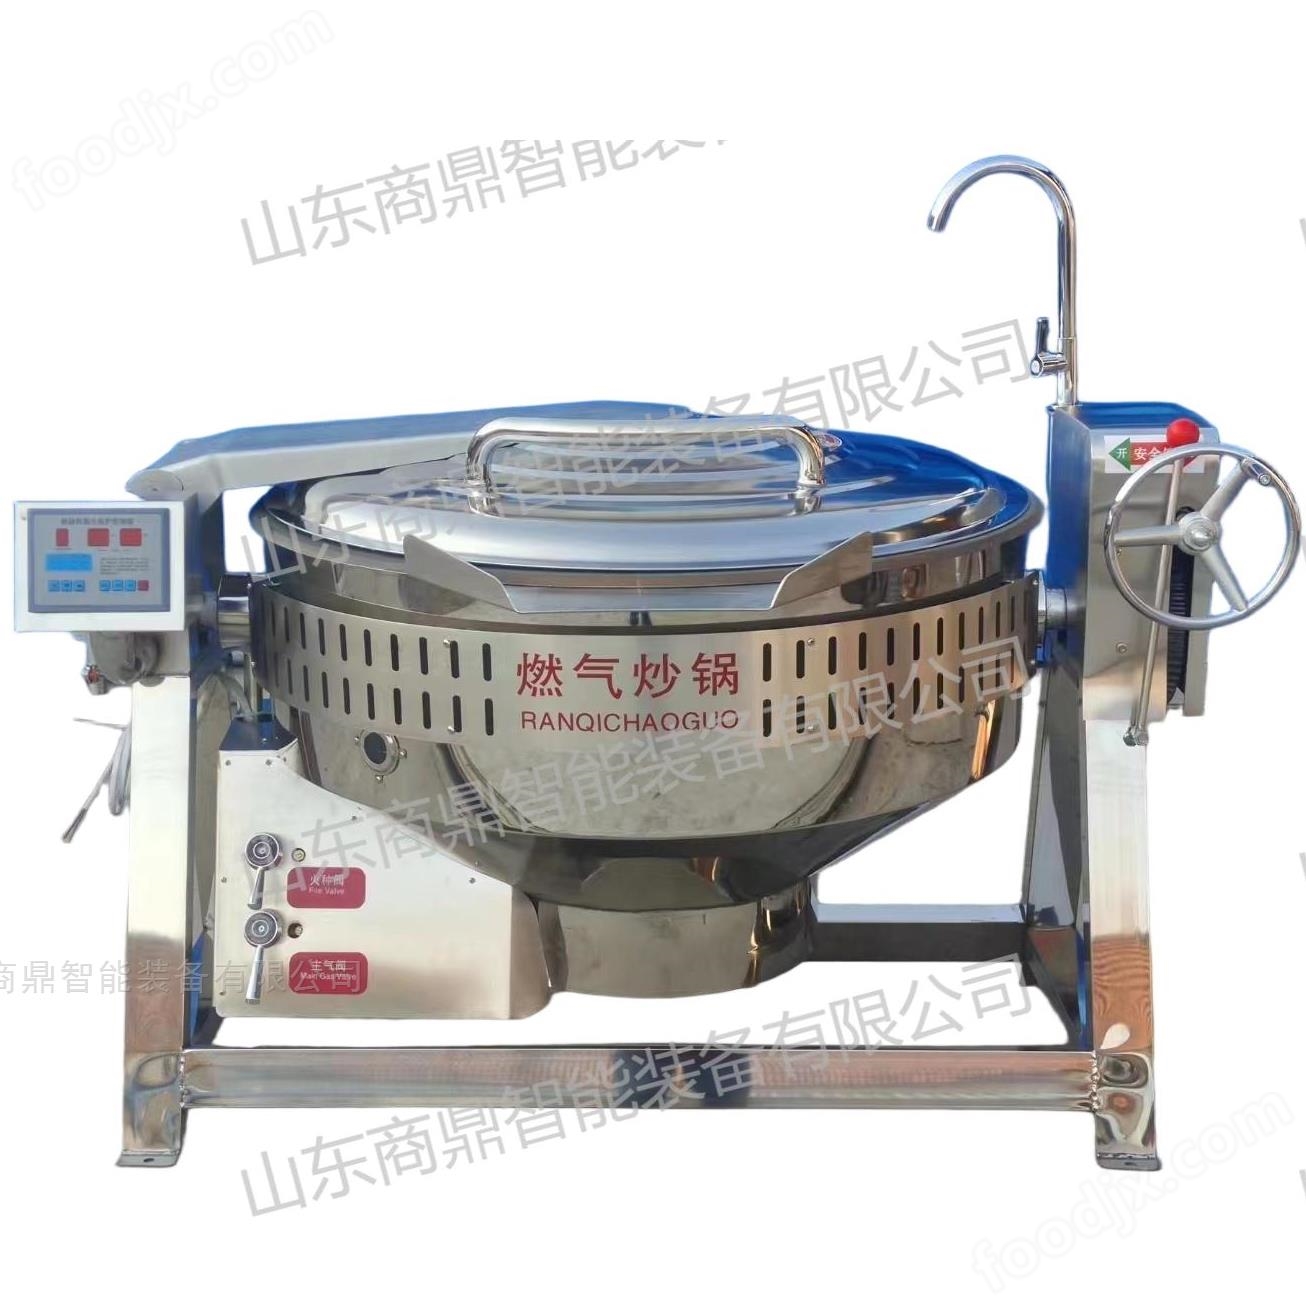
The tilting gas frying pan adopts fully premixed combustion technology and a DC variable frequency fan to achieve infinite speed regulation of firepower. It also uses a flameout protection system to automatically close the gas valve in case of unexpected flameout, ensuring safety and reliability. High heat load, high thermal efficiency, energy-saving and efficient
Product Details
1、 Product installation
1. This product needs to be installed in a well ventilated indoor environment, and specialized ventilation equipment needs to be equipped above it. The minimum height of the ventilation hood is 2100mm.
2. It is necessary to clarify the type of gas used and the gas pressure used. If you need to change the gas type, please contact our company.
3. Positioning and fixation
This product is packaged as a whole for transportation. After removing the packaging, move the product to the area where it needs to be installed, determine the position of the rack fixing hole, and then use M10 expansion screws to position the rack. Adjust the rack to a horizontal position to ensure smooth and reliable operation of the machine. Secure the entire rack with locking nuts. When multiple units of this product are placed and installed, the spacing should not be less than 700mm (Figure 2). The direction of the exhaust port needs to be close to the wall, and it is strictly prohibited to face towards the logistics channel or areas where people are walking.
4. Connect the gas pipeline
Gas pipelines must be installed by personnel with installation and maintenance qualifications. The air inlet of this product is a G 3/4 "inner threaded tube, located on one side of the air inlet combination. The customer's gas interface requires an air inlet control valve, and a gas specific stainless steel impregnated corrugated hose is used to connect the air inlet to the customer's gas interface. It is strictly prohibited to use rubber hoses for connection. Ensure no leakage. The service life of gas specific stainless steel immersed corrugated hoses is limited and needs to be replaced regularly.
5. Connect the circuit
This product uses 220V AC power. Circuit installation must be carried out by professional electricians. This product must be reliably grounded. This product is equipped with a 1.5m power cord, which needs to be connected to the nearest electrical box provided by the customer (requiring conduit protection). The electrical box should be equipped with a main switch and leakage protection.
6. Connect the water pipeline
The water inlet faucet is individually packaged and fixed to a specialized valve fixing plate behind the transmission side assembly. The interface is a G 1/2 "inner threaded pipe. The customer's water circuit valve is equipped with a main valve, and a metal hose is used to connect the water inlet to the customer's water circuit interface. Ensure no leakage.
IIProduct usage and operation methods
1. Preparation before startup.
Confirm that the circuit, gas pipeline, and waterway are properly connected without any leaks or electric leakage.
Clean up the debris on site, lift the lid of the pot, clean the iron pot, and add an appropriate amount of water for the first use.
Be sure to turn on indoor ventilation equipment and maintain a good ventilation environment.
Pull back and rotate the locking handle (Figure 3) of the transmission side combination to the locking position to ensure it is locked. Do not stir fry in an unlocked state as there is a risk of tipping over and food leakage causing burns.
2. Power on.
Power on. Press the power start button (Figure 4), the switch indicator light will turn on, confirm power on.
Open the customer's intake gas control valve and open the combined intake valve on the intake side (Figure 4).
Press the ignition/off button (Figure 4), the green indicator light will start flashing, and the fan will start pre blowing for a short period of time before starting automatic ignition. Observe the ignition status from the observation hole (Figure 4) and quickly rotate the ignition control handle to the low fire area (green) to observe the flame condition. Rotate the ignition control handle to the high fire area (red) to observe the flame condition.
If the ignition is unsuccessful, the system will emit a continuous beep alarm sound, and the fan will continue to blow. At this time, it is necessary to immediately close all manual gas valves, contact maintenance personnel or our company's after-sales service in a timely manner, check the system to eliminate faults, and ensure safety before use.
If an unexpected shutdown occurs midway, the system will automatically close the solenoid valve and emit a beeping alarm sound. At this time, it is necessary to immediately close all manual gas valves, contact maintenance personnel or our company's after-sales service in a timely manner, check the system to eliminate faults, and ensure safety before use.
In operation, the fire control handle can be adjusted as needed to switch back and forth between high fire (red area) and low fire (green area). Do not turn the handle towards the yellow area during normal combustion use, as it may cause stalling.
During the cooking, stir frying, and steaming process, it is strictly prohibited to touch the outer surface of the pot with any part of the body.
3. Shut down.
After cooking, press the ignition/off button, the system will automatically shut down, the green light will flash, and all manual gas valves will be closed. Point the ignition control handle horizontally towards the closed position.
After the system automatically shuts down, the fan continues to blow and wait for the green light to flash before turning off the power start button and waiting for the next operation.
Do not turn off the power before the fan has finished blowing.
4. Discharge.
After cooking, pull back the locking handle of the transmission side combination and fix it in the unlocking position.
After ensuring that the combustion system is turned off, place the hopper and slowly turn the handwheel clockwise (Figure 3) to pour the cooked material into the hopper. The maximum flipping angle of the pot body can reach 90 °. The height of the hopper should be kept as low as possible below 180mm. During the pouring process, there is a risk of splashing high-temperature food soup to prevent burns.
After pouring, rinse the iron pot clean and slowly turn the handwheel counterclockwise to turn the pot to the horizontal position. Pull back the locking handle and turn it to the locking position to ensure it is locked.
Similar Product Recommend